Compression du master bus avec le SSL G Buss : l'approche de Fab Dupont
Présentation du choix de compression du bus maître
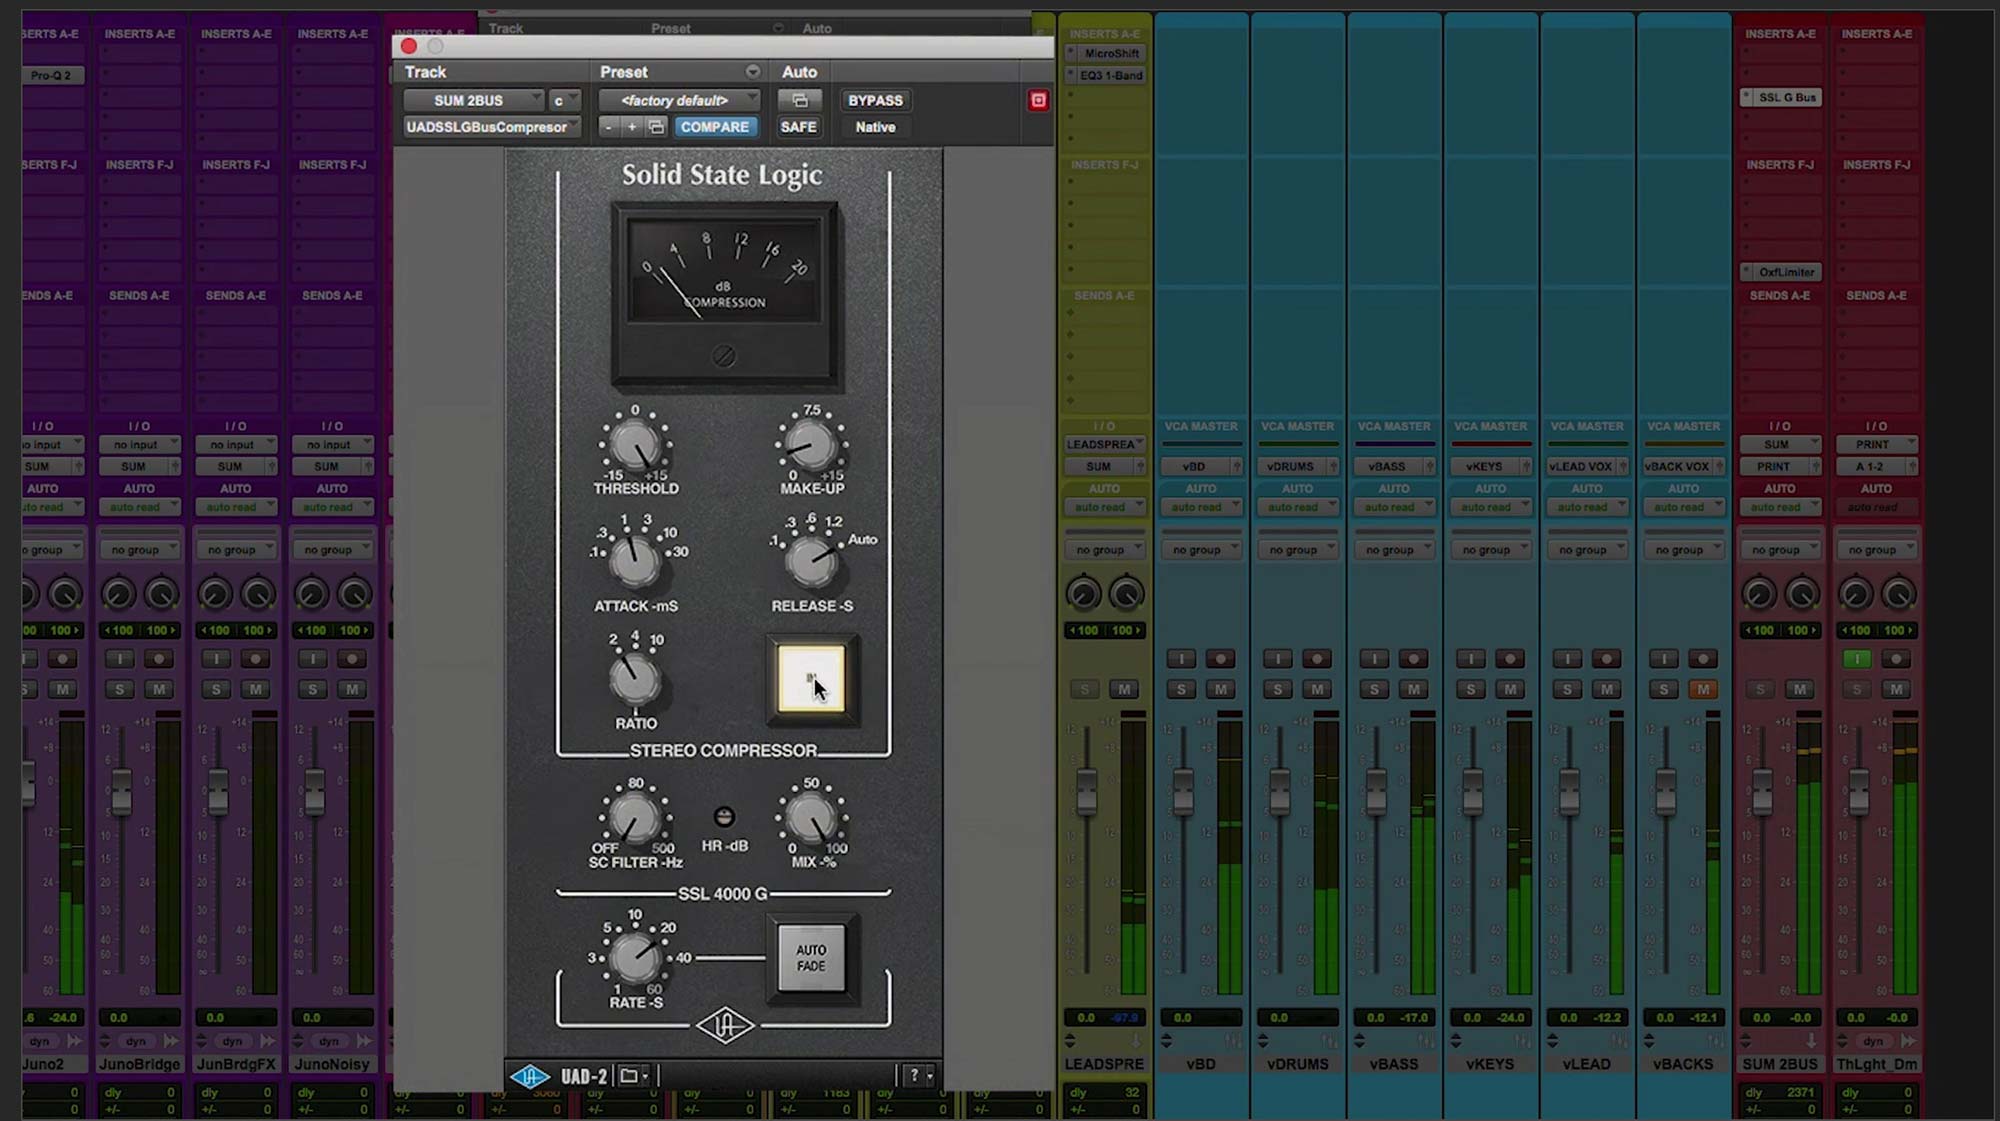
Ouverture du plug-in SSL G Buss Compressor
Dans cet extrait de la vidéo "Fab Mixing TMBOY," nous retrouvons Fab DuPont alors qu'il se demande quel type de compression sur le master bus appliquer sur son mix de la chanson "The Light." Après avoir écouté une portion du mix, il dit qu'il regarde le (master) mètre et qu'il bouge trop vite. Il décide d'ouvrir le plug-in UAD SSL G Buss Compressor.
Ralentir les aiguilles pour plus de densité
Il veut ralentir le mouvement des aiguilles. Par là, il entend diminuer la plage dynamique, ce qui donne plus de densité au mix. Autrement dit, en compressant légèrement les crêtes, ce qui réduit la différence entre les parties les plus fortes et les plus faibles, l'ensemble du mix paraîtra plus dense. On entendra un peu mieux les éléments de faible niveau et un peu moins les éléments forts et pointus.
LET IT REIGN : première approche de compression
Utiliser le SSL pour maîtriser le mix
Fab dit qu'il existe plusieurs approches pour régler un compresseur de bus. Dans ce cas, il va appliquer une compression parallèle. Mais d'abord, il montre quelques autres alternatives.
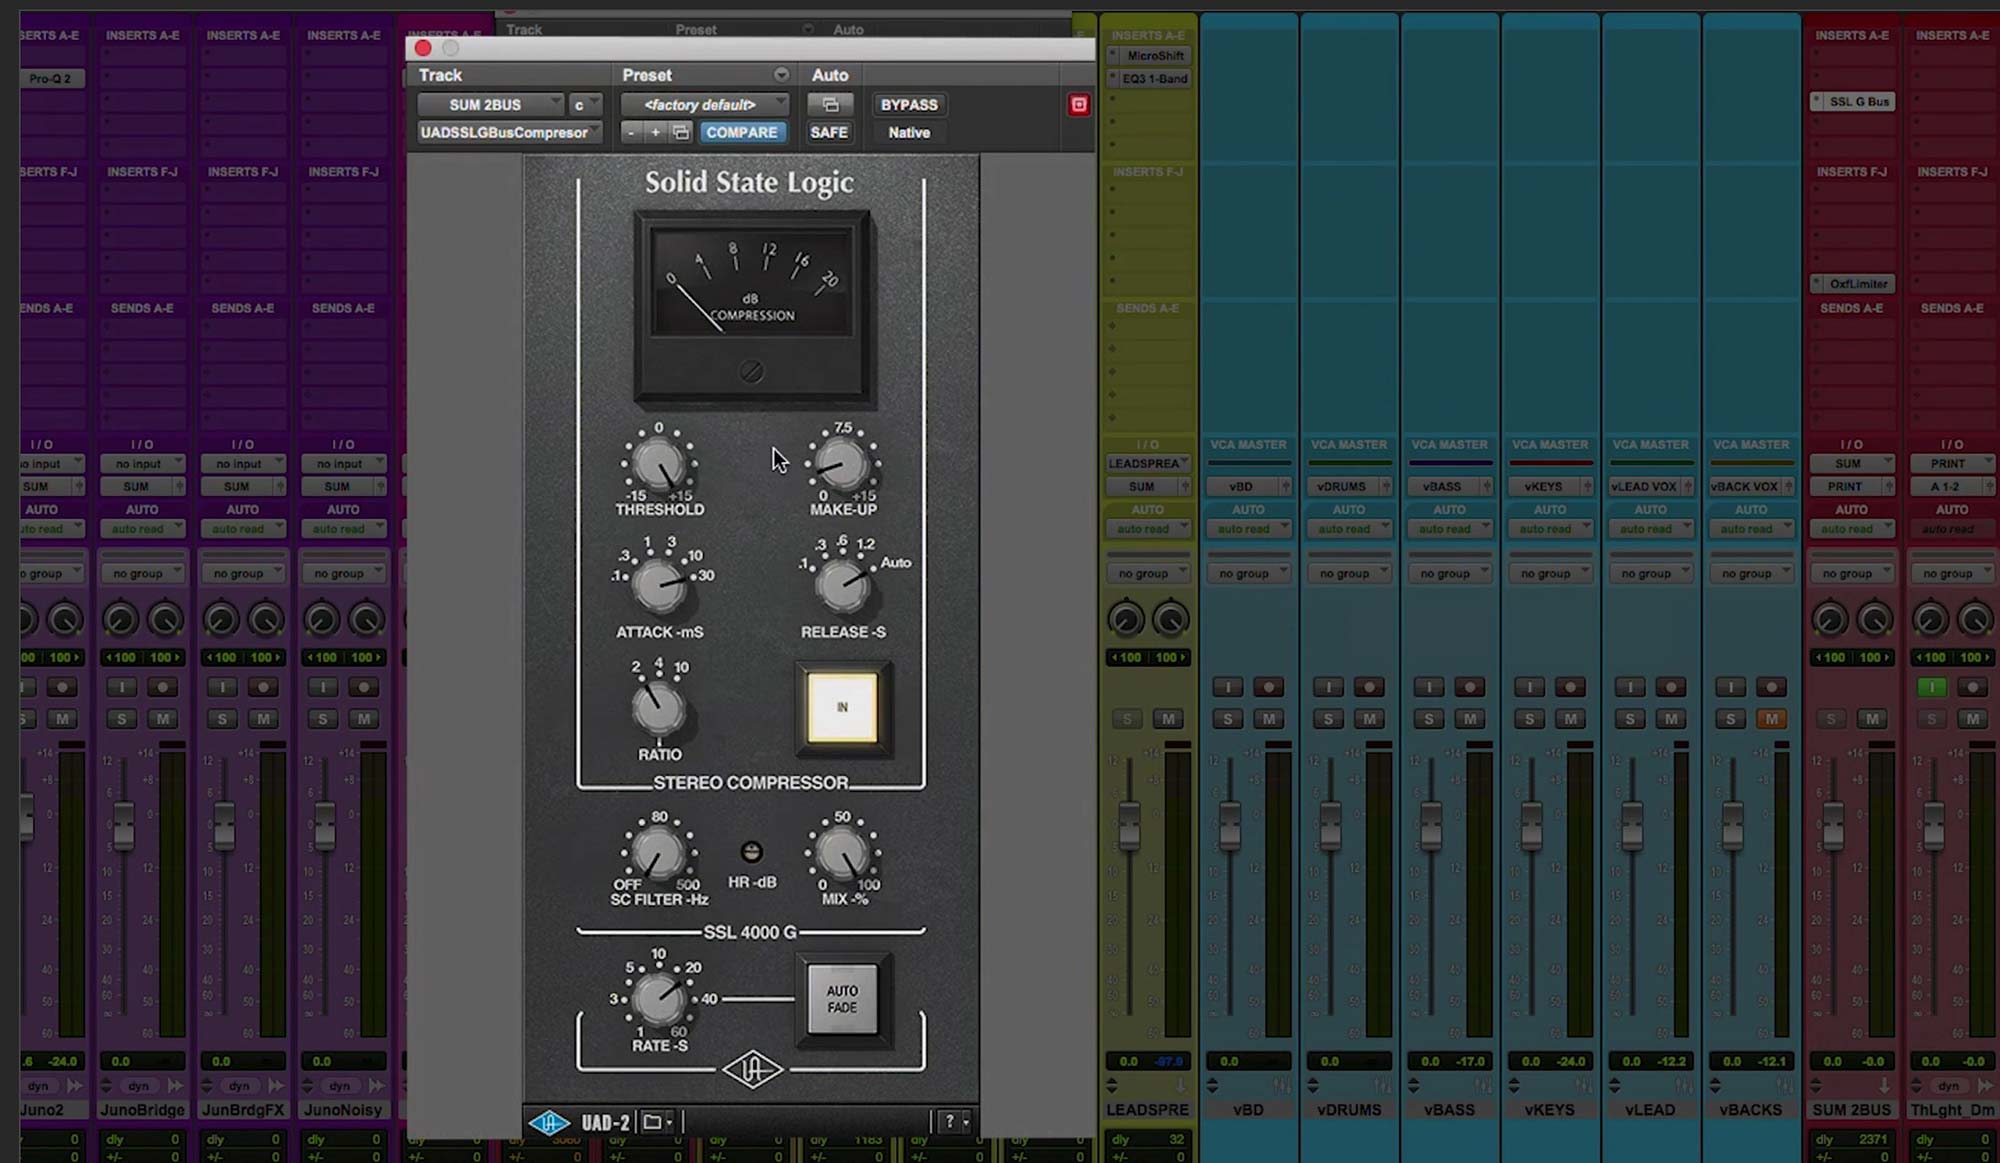
Il dit qu'une façon d'utiliser le compresseur de bus est de le régler simplement pour maîtriser les choses. Là encore, il parle de la plage dynamique et des transitoires. Il laisse le Threshold à son réglage le plus élevé, l'Attack sur 1 (ce qui est un peu plus rapide que le point médian), le Makeup Gain vers 8 heures, le Release sur Auto et le Ratio sur 2:1. Notez que même si le Threshold est au réglage le plus élevé, il obtient quand même une certaine réduction de gain. C'est une particularité de ce compresseur en particulier. La majorité des compresseurs ne donneront aucune réduction si vous laissez le Threshold tout en haut.

Réglage initial de Fab avec une Attack relativement rapide et un Release Auto.
Comparer mix compressé et non compressé
Fab compare le mix avec et sans compression. Il dit que les réglages qu'il a utilisés ont réussi à tout ramener, et il mentionne aussi l'effet de filtrage passe-haut caractéristique du SSL Bus compressor.
Aller plus loin : un réglage plus percutant
Ouvrir l'Attack pour plus de punch
Ensuite, il montre comment on peut aller plus loin, en ouvrant l'Attack pour obtenir du punch supplémentaire. Il pousse le bouton Attack sur son réglage le plus lent et abaisse le Threshold à environ +7. Il met aussi le Release sur son réglage le plus rapide.

Dans son réglage suivant, il ralentit l'Attack, ce qui signifie que moins de transitoires seront compressés, rendant le mix plus percutant.
Ajouter de la compression parallèle pour contrôler
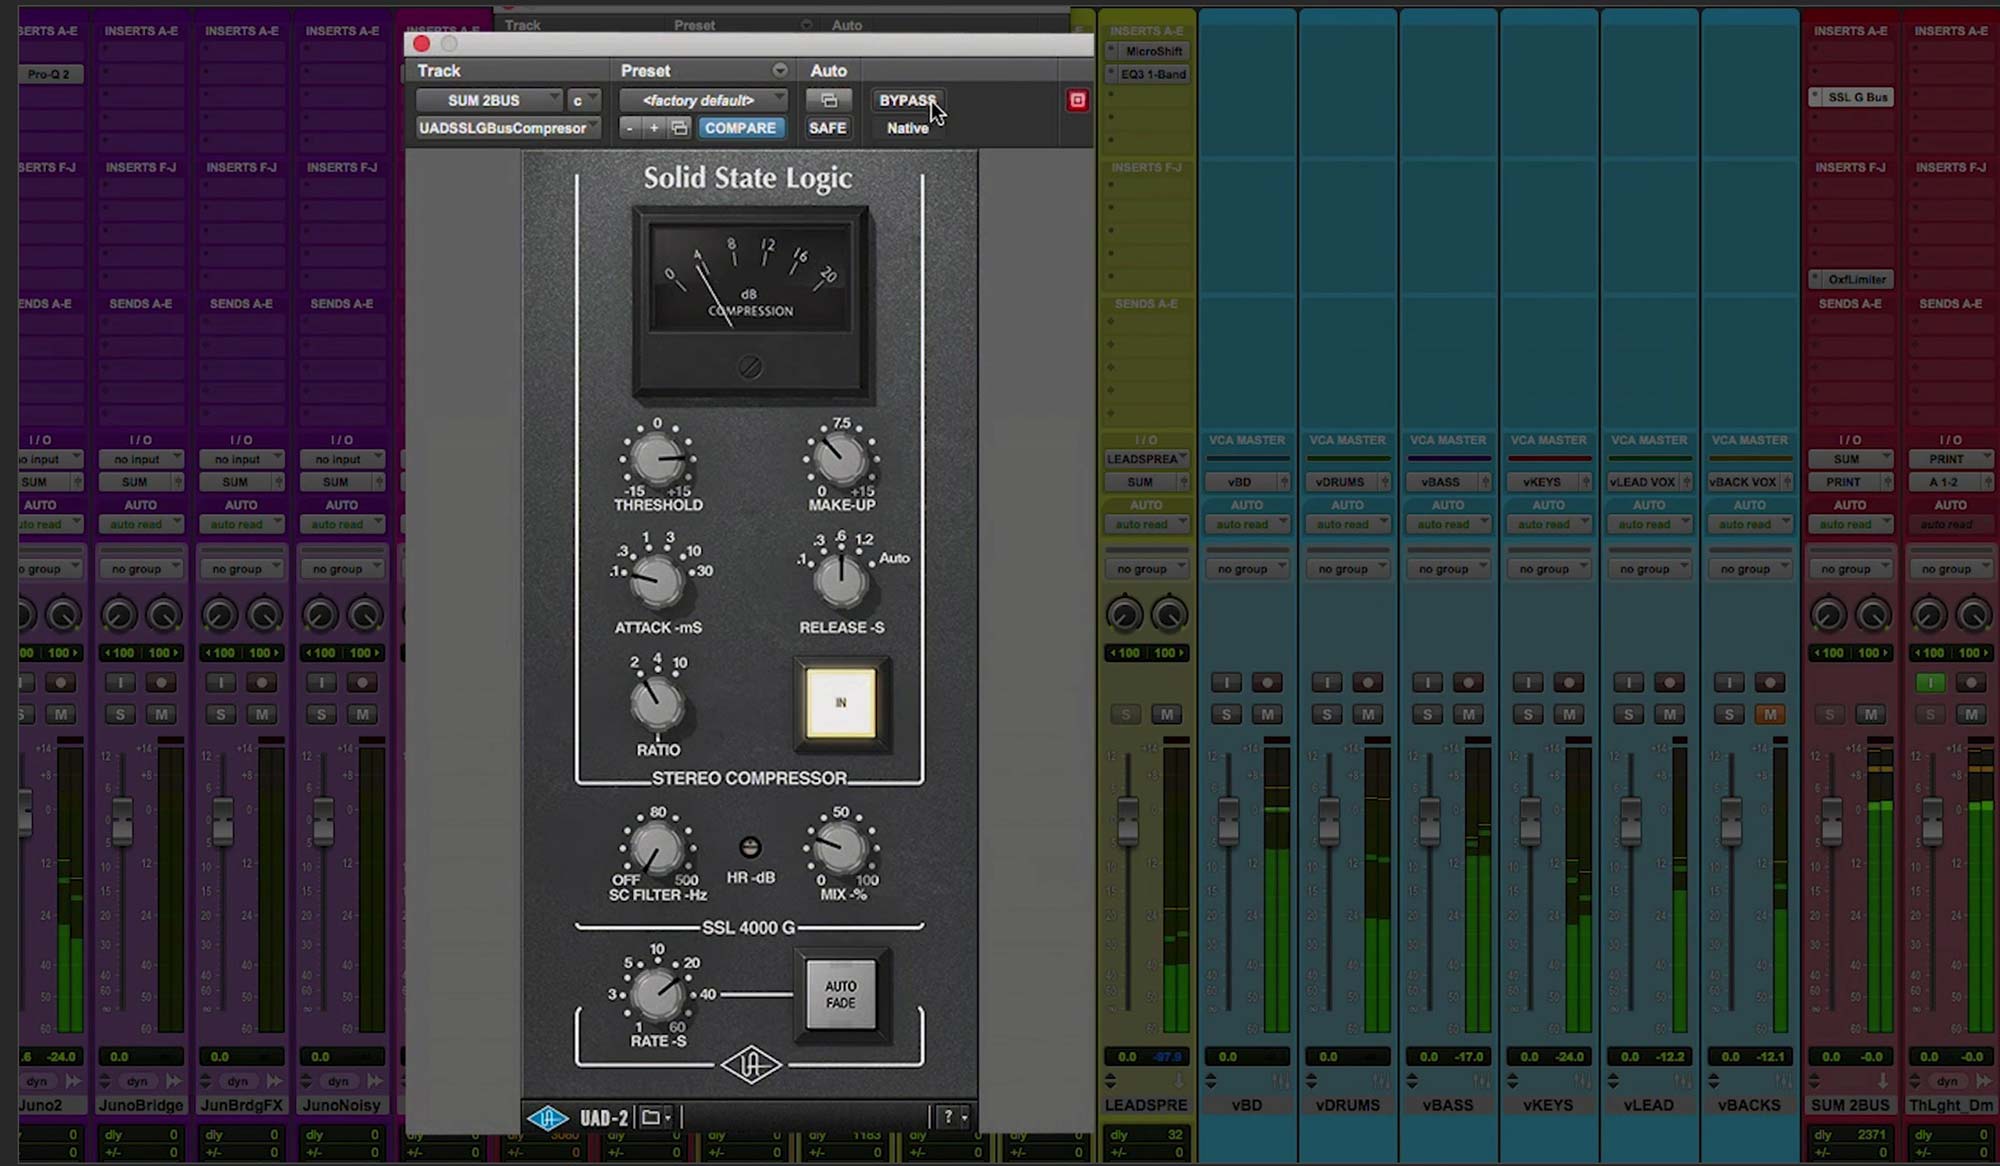
Après avoir joué la même section du mix avec les nouveaux réglages, il observe que ça ne sonne pas si bien. Par là, il veut dire que c'est trop compressé. Il corrige cela en reculant le contrôle Mix pour créer une compression parallèle. Il le ramène lentement à environ la moitié (50%). Maintenant, ça a plus de punch. "Mais," dit-il, "les aiguilles ne se sont pas ralenties."
Si vous vous demandez, la compression parallèle se réalise en créant une copie fortement compressée de l'audio source puis en la mélangeant avec l'original suffisamment pour obtenir la compression souhaitée. Un contrôle Mix sur un compresseur donne un effet parallèle, mais il est créé de manière opposée—c'est-à-dire qu'au lieu de mélanger l'audio compressé dans le signal sec, vous mélangez l'audio sec dans le signal compressé.
ON THE ATTACK : un troisième réglage
Attack rapide, Release lent, réduction de gain plus importante
Ensuite, Fab propose une autre alternative pour régler le compresseur de bus. D'abord, il remet le Mix à 100%, règle l'Attack sur son réglage le plus rapide et ralentit le Release. Les aiguilles montrent presque 8 dB de réduction de gain à leur pic. Il note que les aiguilles bougent plus lentement avec ce réglage.
Ajouter le signal non compressé pour la compression parallèle
Ensuite, il descend le contrôle Mix à environ 10 heures. Cela atteint l'objectif d'avoir plus de rondeur et plus de densité. Il dit que l'on obtient les transitoires du son direct et une sorte de "mous" du compresseur.

En baissant le contrôle Mix et en faisant entrer le signal sec avec l'audio compressé, vous pouvez créer une compression parallèle.
Régler le Sidechain Filter sur le compresseur de bus
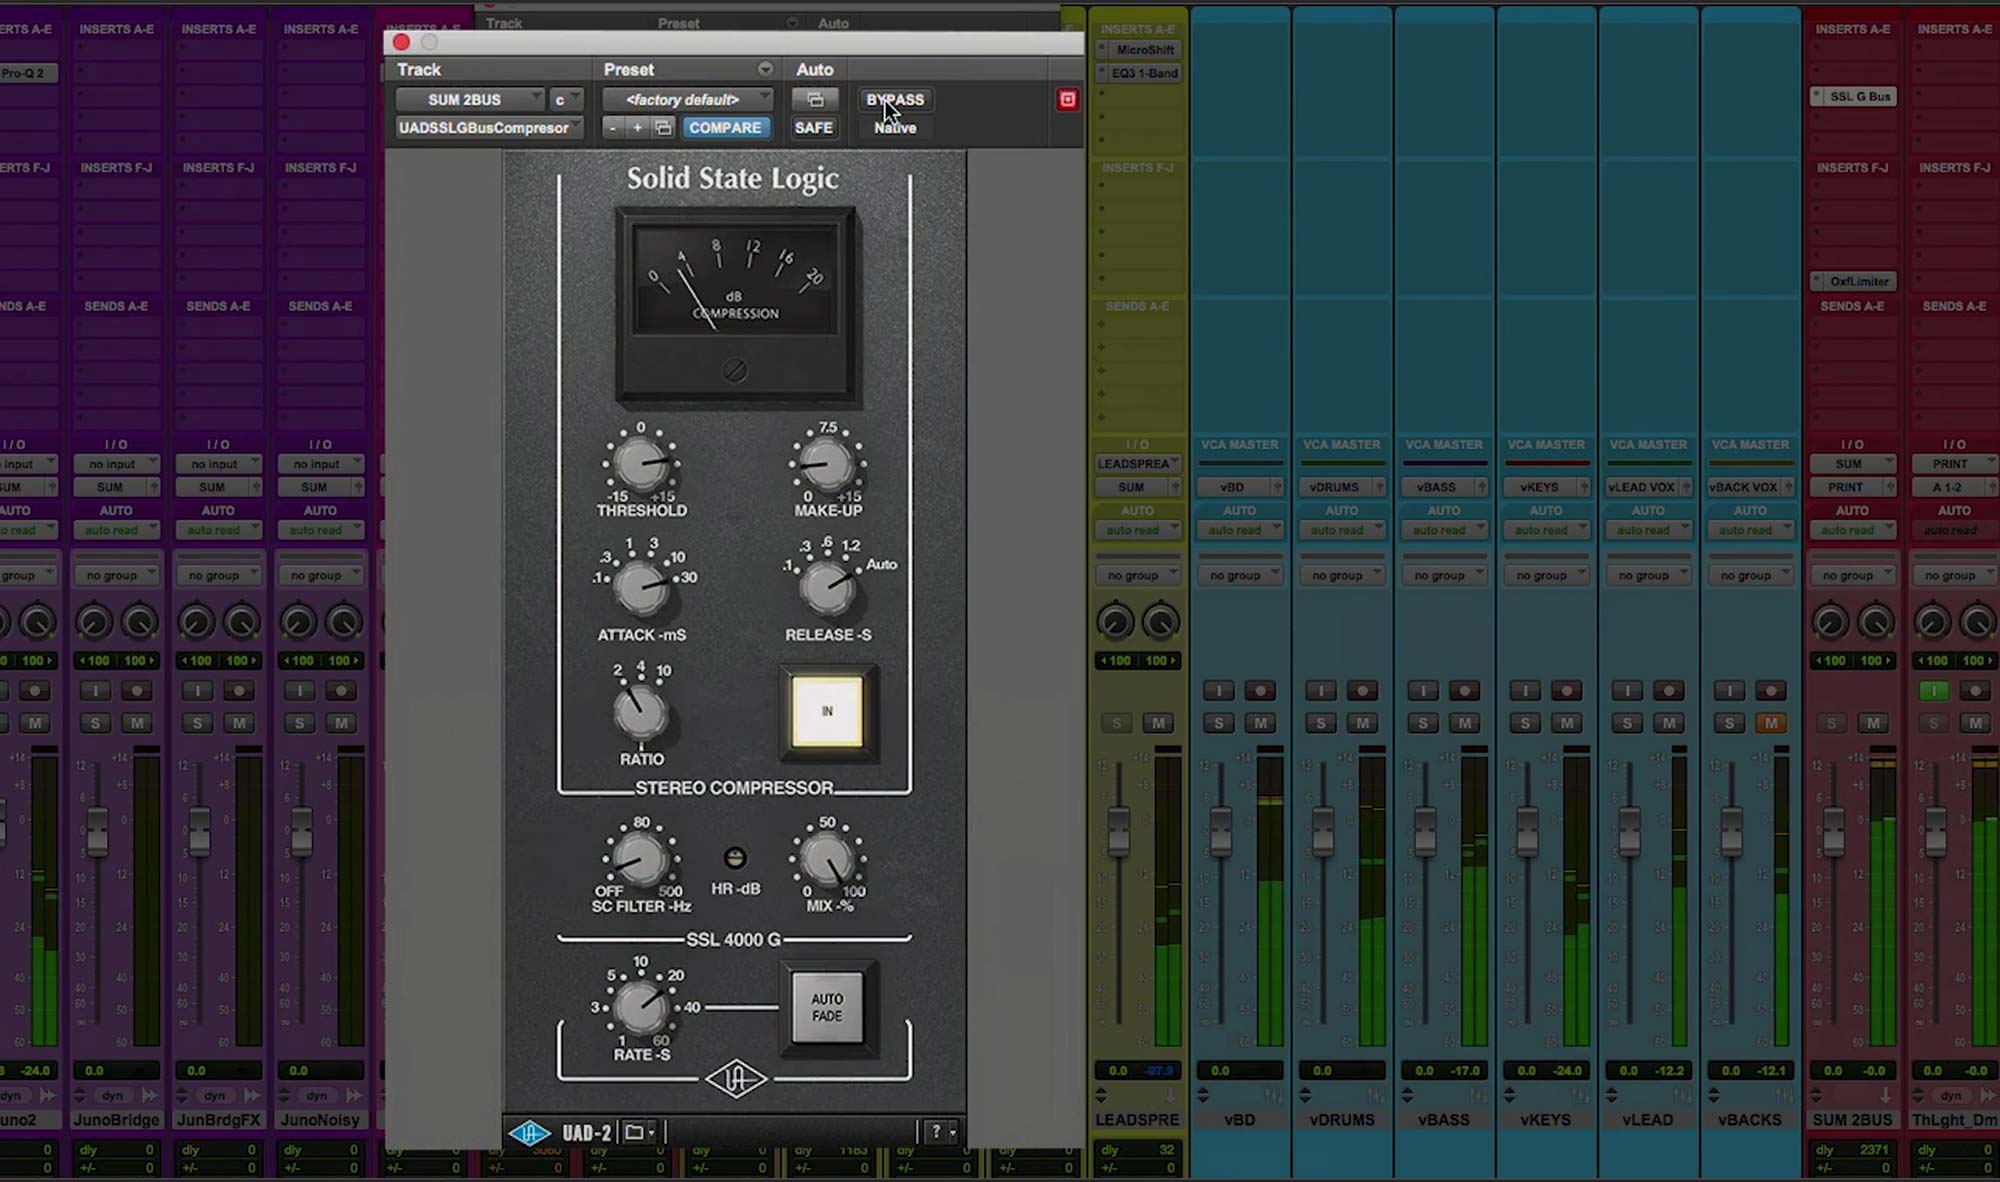
Il suggère ensuite une autre option, qui consiste à laisser les mêmes réglages mais à monter le Sidechain Filter (qui est un filtre passe-haut) suffisamment haut pour que la grosse caisse ne déclenche plus le compresseur (plus d'infos sur les sidechain filters un peu plus loin dans cet article).
Après l'avoir rejoué, il dit que ça fonctionne. Il note que parmi les trois types de réglages qu'il vient de démontrer, celui qu'il a préféré était l'Attack ouvert (lent) avec l'Auto-Release activé et le Mix à 100%. Puis il essaye avec le Sidechain Filter activé. Il dit qu'il préfère avec le filtre réglé très bas, vers 8 heures (quelque part entre 30-40 Hz, le contrôle n'offre pas de lecture précise). Avec ce réglage, il obtient environ -4 dB de réduction de gain.

Le réglage qu'il préfère dans ce cas a l'Attack lente, l'Auto-Release activé et un peu de filtrage sidechain.
LES ROUES DU BUS
Avant d'aller plus loin, il est important de préciser que vous n'avez pas nécessairement besoin de choisir un compresseur dédié pour votre master bus. Toutes sortes de types de compresseurs (et leurs émulations numériques) ont été utilisés pour cette tâche, y compris les compresseurs de type VCA (comme le SSL que modélisent les UAD), FET, à lampe (MU) et optiques. Vous voulez évidemment un compresseur qui mette votre mix en valeur et qui offre tous les paramètres dont vous avez besoin pour créer un réglage efficace. Il est particulièrement utile d'avoir une option d'auto-release.
Comprendre les réglages d'Attack
Montrer les différences de temps d'Attack
Voici maintenant quelques exemples pour illustrer davantage certains points que Fab aborde dans la vidéo, en commençant par l'effet du paramètre Attack. Pour ceux qui ne connaissent pas, l'attack gouverne la rapidité avec laquelle un compresseur agit sur l'audio qui dépasse le threshold, et affecte principalement les transitoires d'un mix. Par exemple, une caisse claire est généralement forte dans un mix, et souvent ses transitoires déclencheront la compression. Si l'attack est trop rapide, elles seront adoucies, ce qui enlève du punch.
Écoutons la différence entre un compresseur de bus avec une attack rapide et lente. Nous resterons avec le même plug-in UAD SSL G Buss Compressor que Fab a utilisé. Les réglages sont un peu exagérés, pour que vous puissiez entendre les différences plus clairement.
Exemple 1 : Attack lente vs rapide sur le bus de mix
Exemple 1 : Pendant les quatre premières mesures, le compresseur de bus est éteint.
Pour les quatre mesures suivantes, il est activé avec son Attack la plus lente, Auto-Release, un ratio de 2:1, et environ 4 dB d'atténuation. Pour les quatre dernières mesures, l'Attack est réglée sur sa position la plus rapide, avec le même Release et Ratio. Comme l'Attack est plus rapide, elle compresse beaucoup plus fortement. En fait, l'atténuation est presque le double dans ces quatre dernières mesures par rapport au milieu, parce qu'avec l'Attack rapide, il écrase davantage les transitoires initiaux. Ça sonne beaucoup moins "ouvert" avec l'Attack aussi rapide.
Comprendre le Sidechain Filter
Comment le filtrage sidechain affecte la compression
Dans une autre partie de la vidéo, Fab a monté le Sidechain Filter pour empêcher la grosse caisse de déclencher le compresseur. La raison pour laquelle cela fonctionne est que les fréquences graves ont plus d'énergie que les signaux dans d'autres plages de fréquences, et déclenchent donc les compresseurs plus fortement. Le Sidechain Filter n'affecte pas la réponse en fréquence de la sortie audio, mais se trouve plutôt sur un circuit de détection séparé, qui est utilisé pour déclencher le compresseur. Donc, quand vous montez la fréquence d'un sidechain filter, le circuit de détection voit moins de basses, et par conséquent la basse et la grosse caisse ne le déclenchent plus, ou du moins moins.
Exemple 2 : Monter le Sidechain Filter pour plus de présence de la grosse caisse
Exemple 2 : Dans les quatre premières mesures, le Sidechain Filter est désactivé.
Dans les quatre suivantes, il est réglé à environ 90 Hz, ce qui fait ressortir la grosse caisse et la basse, car elles ne déclenchent plus le compresseur comme avec le Sidechain Filter désactivé. Dans les quatre dernières mesures, le contrôle Mix passe de 100% à environ 40%, pour créer une compression parallèle, et vous entendez moins la compression dans l'ensemble.