Music mixing transforms individual recorded tracks into polished, professional-sounding songs that captivate listeners.
Whether you’re a bedroom producer creating your first beats or an experienced engineer refining your craft, understanding how to mix music effectively is essential for creating compelling audio that translates well across all playback systems.
This comprehensive guide covers everything from the fundamental concepts of mixing music to advanced professional techniques used by industry engineers.
Along the way, we’ll explore the different aspects of music mixing, including technical, artistic, and emotional considerations, that contribute to a professional sound. You’ll learn the step-by-step process of building a mix, discover essential equipment, software, and virtual instruments, and master the skills needed to create professional-quality results from your own music.
What Is Music Mixing and Why It Matters
Audio mixing is the process of combining multiple audio tracks, such as vocals, instruments, and effects, into a single cohesive stereo recording. During this process, engineers balance volume levels, adjust stereo positioning, shape frequency content, and apply spatial effects to create depth, clarity, and emotional impact.
Musicians have historically played a key role in the sound recording and mixing process, from performing together in early live recordings to using modern multitrack recording techniques that allow separate editing and mixing of each musician’s part.
The primary goal when you mix music is to ensure each element serves the song while maintaining balance and separation. A good mix allows listeners to hear every important musical element clearly, whether they’re using studio monitors, headphones, or phone speakers.
Ultimately, the specific methods or rules you follow in mixing do not matter as much as achieving a result that sounds good and serves the song.
The Difference Between Mixing and Mastering
Many producers confuse mixing with mastering, but these are distinct stages in music production.
Mixing focuses on balancing and processing individual tracks within a song, while the mastering stage optimizes the final stereo mix for commercial release.
During mixing, you might adjust the level of a particular instrument or add reverb to vocals. The mastering process involves applying final EQ, compression, and limiting to the complete mix.
Why Proper Mixing Matters
Professional mixing elevates amateur recordings into radio-ready productions. Without proper mixing techniques, even the best performances can sound muddy, unbalanced, or lifeless. A well-executed mix:
-
Creates separation between instruments occupying similar frequency ranges
-
Establishes a compelling stereo image that engages listeners
-
Controls dynamics to maintain consistent energy throughout the song
-
Ensures the most important elements (typically vocals) capture the listener’s attention
-
Provides sufficient headroom for the mastering stage
Professional mixing engineers understand that their role extends beyond technical processing, they shape the emotional narrative of the song through careful balance and spatial placement.

Essential Equipment and Software for Music Mixing
Creating professional-quality mixes requires the right combination of hardware and software, with the ability to record high-quality audio serving as the foundation for a good mix. While expensive gear isn’t necessary for good results, certain essential components will significantly improve your mixing capabilities. Modern mixing setups often include virtual instruments, which emulate traditional instruments within the DAW environment.
Required Hardware Components
Computer and Audio Interface A reliable computer with sufficient processing power forms the foundation of any modern mixing setup. For mixing music effectively, aim for at least 16GB of RAM and a multi-core processor. Your audio interface converts analog signals to digital and provides low-latency monitoring. Popular options include the Focusrite Scarlett series for budget setups or Universal Audio Apollo interfaces for professional applications.
Studio Monitors and Headphones Accurate monitoring is crucial for making good decisions during the mixing process. Near-field studio monitors like the Yamaha HS8 or KRK Rokit series provide detailed frequency response for critical listening. Complement your speakers with quality headphones such as the Audio-Technica ATH-M50x or Sennheiser HD 650 for detailed work and late-night sessions.
Room Treatment for Home Studios Untreated rooms create acoustic problems that mislead your ears during mixing. For under $500, you can significantly improve your listening environment with acoustic panels at reflection points, bass traps in corners, and proper monitor positioning. Even simple solutions like heavy curtains and furniture placement can reduce unwanted reflections.
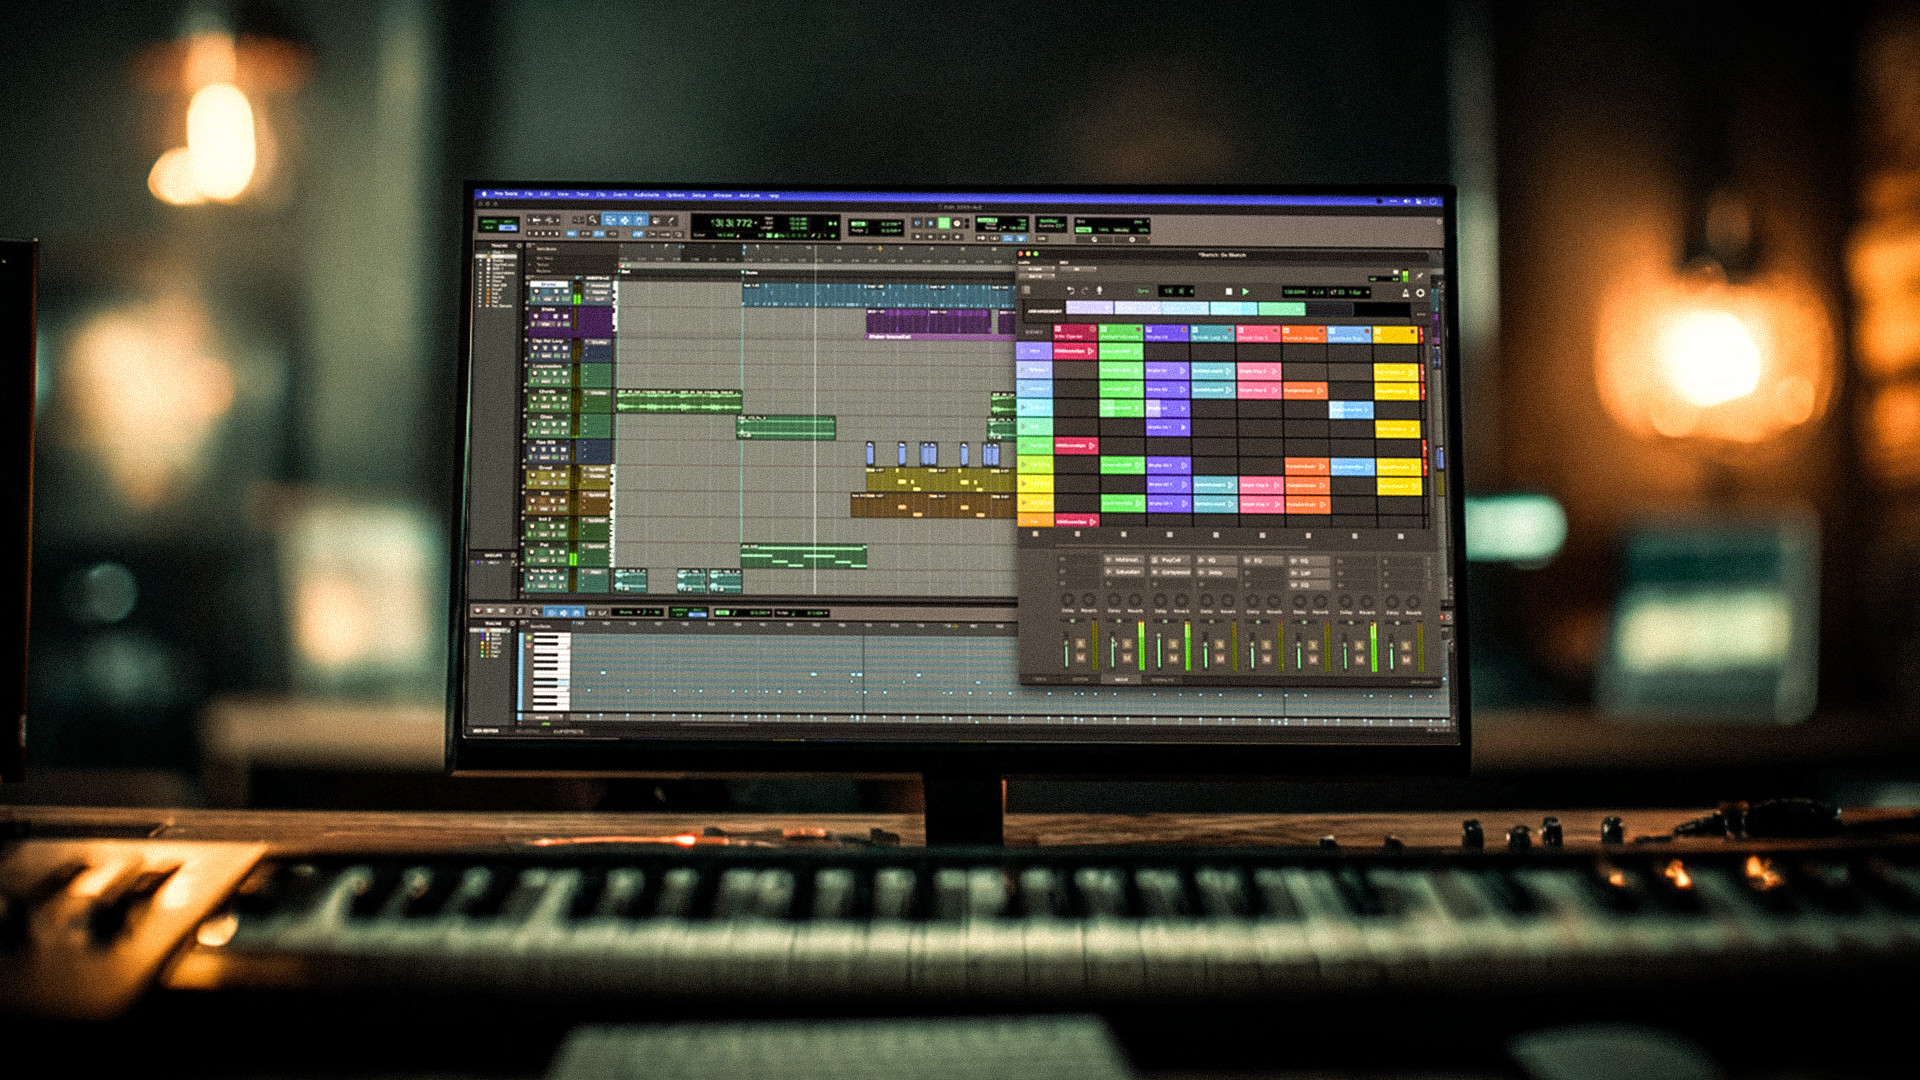
Digital Audio Workstations (DAWs)
Your choice of DAW affects your mixing workflow and available tools. Popular options include:
-
Pro Tools: Industry standard for professional studios, excellent for large sessions
-
Logic Pro X: Comprehensive package with high-quality built-in plugins
-
Ableton Live: Excellent for electronic music production and creative mixing
-
Reaper: Affordable option with powerful customization capabilities
Most DAWs also include virtual instruments, which are software-based emulations of traditional instruments. These virtual instruments allow for flexible sound creation and arrangement within the digital environment.
Each DAW includes basic mixing tools, but professional results often require additional plugins for advanced processing.
Essential Plugin Categories
EQ Plugins Equalizers shape the frequency content of individual tracks and the overall mix. FabFilter Pro-Q 3 offers surgical precision with dynamic EQ capabilities, while Waves Renaissance EQ provides musical analog-style coloration. Manley Massive Passive EQ is another acclaimed option used by top mixers. Every mixer needs at least one high-quality parametric EQ for detailed frequency work.
Compression and Dynamics Compressors control dynamic range and add character to recordings. Universal Audio’s 1176 and LA-2A plugins emulate classic hardware units, while modern tools like FabFilter Pro-C 2 provide transparent control with visual feedback. Include gate plugins for removing unwanted noise between phrases.
Reverb and Delay Effects Spatial effects create depth and dimension in mixes. Convolution reverbs like Audio Ease Altiverb offer realistic acoustic spaces, while algorithmic reverbs provide creative possibilities. Quality delay plugins enable rhythmic effects and spatial enhancement without cluttering the mix.
Saturation and Harmonic Enhancement Saturation plugins add warmth and harmonic richness that makes digital recordings sound more analog and musical. Popular options include Decapitator by Soundtoys and various tape emulation plugins.
Understanding Song Structure
A deep understanding of song structure is a key asset for any mixing engineer aiming to create a compelling and professional mix.
Most songs are built from sections like the intro, verse, chorus, bridge, and outro, each serving a unique purpose in the overall flow of the music. When mixing music, it’s important to recognize these sections and tailor your approach to highlight their individual characteristics.
For example, the intro often sets the mood and may benefit from a gradual build-up of instruments or effects to draw the listener in. Verses typically focus on storytelling and may require a more intimate sound, with vocals and key instruments taking center stage. The chorus is usually the most energetic and memorable part of the song, so it’s crucial to ensure that both vocals and instruments are balanced and powerful, capturing the listener’s attention. Bridges and outros can introduce new sounds or strip back elements to create contrast and maintain interest.
By identifying the song structure early in the mixing process, you can make informed decisions about which elements to emphasize, when to introduce or remove instruments, and how to use effects to enhance transitions. This approach helps you create a mix that feels cohesive and dynamic, ensuring each section of the song shines in its own way and supports the overall emotional impact of the music.
Step-by-Step Music Mixing Process
Successful mixing follows a systematic approach that builds complexity gradually. The first thing you should do when starting a mix is to listen carefully to the raw tracks and analyze their strengths and weaknesses before making any adjustments. This workflow ensures you address fundamental issues before adding creative elements, resulting in more professional and polished results.
Cleaning Recordings: Start by removing unwanted noise, clicks, or pops from your tracks. However, consider leaving in some subtle human sounds, such as breathing or slight performer noises, as these can enhance the authenticity and intimacy of the mix by preserving the human feel.
Preparation and Organization
Track Organization and Color Coding Before making any sonic adjustments, organize your session for efficiency. Group related instruments together, drums, bass, guitars, keys, vocals, and use consistent color coding. Create a logical track order that follows the song structure and makes navigation intuitive during long mixing sessions. Don’t forget to check the master fader and monitor your mixing environment, as these are often overlooked but crucial for accurate mixing.
Proper gain staging prevents distortion and maintains headroom throughout the signal chain. Set input levels so peaks hit around -12dB to -6dB, leaving room for processing without clipping. Use clip gain or trim plugins to achieve optimal levels before applying EQ or compression.
Cleaning Recordings Remove unwanted noise, clicks, pops, and breath sounds that distract from the musical content. Use gate plugins to eliminate bleed between drum hits or vocal phrases. Clean recordings provide a solid foundation for all subsequent processing and prevent small problems from becoming major issues.
Creating the Rough Mix Start with all faders down and gradually bring up elements in order of importance. Typically, this means starting with drums and bass, adding melodic instruments, and finally placing vocals at the appropriate level. This rough mix establishes basic balance before applying detailed processing.
Building Your Mix Foundation
Establishing the Rhythm Section The combination of drums and bass forms the foundation that supports all other musical elements. Start by balancing the kick drum and bass guitar, ensuring they occupy complementary frequency ranges rather than competing. Use high-pass filtering on the bass around 30-40Hz to remove subsonic content that wastes headroom and causes problems on small speakers.
Frequency Separation Techniques When multiple instruments occupy similar frequency ranges, they can mask each other and create a muddy mix. Create separation by assigning different frequency emphasis to competing elements. For example, if both bass guitar and kick drum compete around 60-80Hz, emphasize the kick in this range while focusing the bass slightly higher at 80-120Hz.
Vocal Placement and Priority In most popular music genres, vocals serve as the focal point that carries the melodic and lyrical content. Position vocals prominently in the mix without overpowering the instrumental elements. Use compression to maintain consistent vocal levels and EQ to enhance clarity and presence.
Maintaining Mono Compatibility Ensure your mix translates well when summed to mono, as many playback systems, including phones and some streaming platforms, reproduce audio in mono. Check for phase cancellation issues between stereo sources and verify that essential elements remain audible when the mix collapses to a single channel.
Creating a Rough Mix
Creating a rough mix is one of the first and most important steps in the music production process. This stage involves combining multiple audio tracks into a single track and making initial adjustments to levels, panning, and other basic parameters. The goal of a rough mix is to establish a foundational balance that gives the mixing engineer a clear sense of how the different elements of the song interact.
A rough mix doesn’t need to be perfect, it’s about getting a general idea of the overall sound and identifying any issues that need attention as you move forward. By listening to the rough mix, you can quickly spot elements that are too loud or too quiet, instruments that clash, or sections that lack energy. This early version of the mix serves as a roadmap, helping you plan your next steps and prioritize which tracks or elements need the most work.
It’s a good practice to create a rough mix as soon as all the tracks are organized in your session. This allows you to hear the song as a whole and make broad adjustments before diving into detailed processing. As you refine the mix, you can revisit the rough mix to ensure you’re staying true to the original vision and maintaining a natural, balanced sound.
Applying Core Mixing Techniques
Strategic EQ Applications Effective equalization enhances natural instrument tones while creating space for all elements. Apply high-pass filtering to approximately 90% of tracks, typically starting around 80-100Hz for most instruments except bass and kick drum. Cut problematic frequencies around 200-500Hz that often create muddiness, and boost presence frequencies around 2-5kHz to enhance clarity. Making certain elements louder in the mix can help them stand out and draw the listener's attention.
|
Frequency Range |
Common Applications |
|---|---|
|
20-60Hz |
Sub-bass, kick drum fundamentals |
|
60-250Hz |
Bass guitar, kick drum punch |
|
250Hz-2kHz |
Vocal body, instrument fundamentals |
|
2-8kHz |
Presence, clarity, vocal consonants |
|
8-20kHz |
Air, sparkle, cymbals |
Compression Settings and Ratios Compression ratios and timing affect both the sound character and dynamic control. Use moderate ratios of 3:1 for vocals to maintain naturalness while controlling peaks. Apply higher ratios of 4:1 or more on drums to add punch and sustain. Set attack times to preserve transients, faster attacks (1-10ms) for sustained sounds, slower attacks (10-30ms) to preserve drum transients.
Stereo Panning Strategies Create width and separation through strategic panning decisions. Panning distributes sounds between the left and right speakers to create a wide stereo image. When a sound is placed at the same level in both channels, it creates a centered phantom image in the stereo field. Keep foundational elements like kick drum, bass guitar, and lead vocals centered for maximum impact. Pan supporting elements to create balance, guitars 30-70% left and right, background vocals spread wide, percussion elements placed for rhythmic interest.
Reverb and Delay Integration Spatial effects should enhance the mix without creating clutter or masking important elements. Use shorter reverb times (0.8-1.5 seconds) for contemporary styles and longer times for ballads or atmospheric music. Set delay times to musical subdivisions that complement the song’s tempo, and use high-frequency cuts to prevent delays from competing with lead vocals.
Advanced Mixing Techniques and Professional Tips
Before diving into specific techniques, it’s important to consider some practical advice that can help both beginners and professionals avoid common mixing mistakes and achieve better results. The following tips and timeless advice will guide you toward improving your mixing skills and producing more polished tracks. Remember, in mixing, what truly matters is the quality of the final sound you achieve, regardless of the specific techniques or rules you follow.
Professional mixing engineers employ sophisticated techniques that separate amateur from commercial-quality productions. These advanced methods require practice but can dramatically improve your mix quality and creative possibilities.
-
When sharing mixing tips or collaborating, make sure you are talking clearly and effectively so your ideas and feedback are communicated well.
Automation and Dynamic Control
Volume Automation for Vocal Consistency Manual volume automation creates more natural-sounding level control than compression alone. Ride vocal levels throughout the song to maintain consistent presence while preserving the natural dynamics of the performance. Volume automation is one of the most common types of automation used in mixing, helping to capture and maintain the listener's attention throughout the track. Automate quieter components like whispered sections or ad-libs to ensure they remain audible without compromising the overall balance.
Creative EQ Automation Automated EQ sweeps create movement and interest in static arrangements. Gradually boost high frequencies during build sections, or create filter sweeps that emphasize different frequency ranges throughout the song. Use automation to solve frequency conflicts that only occur in specific song sections.
Send Effect Automation Control reverb and delay levels dynamically to create space during specific moments without cluttering the entire mix. Automate reverb sends higher during choruses for impact, then reduce them during verses for clarity. Create dramatic reverb throws by automating send levels to 100% for specific words or phrases.
Stereo Width Manipulation Pan automation creates movement and stereo interest that maintains listener engagement. Subtle panning movements on background elements, automated stereo widening during choruses, and creative use of auto-pan effects can transform static arrangements into dynamic soundscapes.

Frequency Management and Spatial Processing
Detailed Frequency Range Management Understanding specific frequency ranges allows for precise tonal shaping. Bass frequencies (60-250Hz) provide warmth and foundation but can quickly overwhelm a mix if not controlled. Midrange frequencies (250Hz-4kHz) contain the fundamental tones of most instruments and require careful balancing. Treble frequencies (4kHz-20kHz) add presence and air but can become harsh if overemphasized.
Sidechain Compression Applications Beyond the obvious EDM pumping effects, sidechain compression solves many practical mixing problems. Sidechain the bass guitar to the kick drum to create space for each element without static EQ cuts. Use vocal-triggered sidechain compression on instrumental elements to automatically create space for lyrics.
Parallel compression, also called “New York compression,” blends heavily compressed signals with unprocessed audio. This technique adds punch to drums and thickness to vocals while maintaining natural dynamics. Process drums through aggressive compression (10:1 ratio, fast attack) and blend with the dry signal for impact without sacrificing transients.
Multiband Dynamics Control Multiband compressors address frequency-specific dynamics issues that full-band processors cannot handle effectively. Control excessive bass frequencies during loud sections while leaving midrange and treble untouched. This targeted approach prevents frequency imbalances that occur when different frequency ranges have different dynamic characteristics.
Using Studio Monitors Effectively
Studio monitors are an essential tool for any mixing engineer working in music production. Unlike consumer speakers, studio monitors are designed to provide a flat, accurate representation of your mix, allowing you to hear every detail and make good decisions about balance, EQ, and effects. To get the most out of your studio monitors, it’s important to position them correctly, ideally forming an equilateral triangle with your listening position and placed at ear level.
Room acoustics can greatly affect what you hear, so take time to calibrate your monitors and, if possible, treat your room with acoustic panels or bass traps to minimize unwanted reflections. Many monitors also have onboard EQ settings that can be adjusted to compensate for your specific listening environment.
In addition to studio monitors, it’s wise to check your mix on headphones. Headphones can reveal details and issues that might be masked by room acoustics, giving you a more complete picture of your mix. By switching between monitors and headphones, you can ensure your mix translates well across different playback systems and make more confident, informed choices throughout the mixing process.
Common Mixing Mistakes to Avoid
Understanding common pitfalls helps you develop better mixing habits and avoid issues that compromise your results. These mistakes often occur gradually during long mixing sessions when objective judgment becomes difficult. Don't forget to check details like the master fader level and your mixing environment, as these are often overlooked but crucial for accurate mixing.
Over-Processing and Compression Artifacts
Excessive compression creates lifeless mixes that lack dynamic interest and musical breathing. Avoid compression artifacts by using moderate ratios and ensuring adequate release times. Heavy compression ratios above 8:1 should be reserved for specific creative effects rather than general dynamics control. Listen for pumping artifacts that occur when release times are too fast for the musical content.
When compression removes too much natural variation, instruments lose their organic character and the mix becomes fatiguing to listen to. Use parallel compression to add control while maintaining natural dynamics, and always A/B test your processing against the unprocessed signal.
Frequency Masking and EQ Problems
Bass and Kick Drum Conflicts The most common frequency masking occurs between bass guitar and kick drum around 60-100Hz. This overlap creates a muddy low end where neither element sounds distinct. Solve this by emphasizing different frequency ranges, focus the kick around 60Hz and the bass around 100Hz, or use sidechain compression to create temporal separation.
Mid-Frequency Buildup Multiple instruments competing in the 200-500Hz range create muddy, unclear mixes. Guitars, keyboards, vocals, and drums all have important content in this range. Use strategic EQ cuts on less important elements and identify which instrument should dominate each frequency band.
Monitoring and Decision-Making Errors
Excessive Volume Monitoring Mixing at loud volumes causes ear fatigue and leads to poor decisions, particularly regarding high-frequency content and compression settings. Loud monitoring makes everything sound exciting initially but prevents accurate judgment of balance and dynamics. Mix at moderate levels (around 85dB SPL) and take regular breaks every 45-60 minutes.
Single-System Monitoring Mixing exclusively on one playback system creates mixes that don’t translate to real-world listening scenarios. Professional mixing requires checking your work on multiple systems, studio monitors, headphones, car speakers, and phone speakers, to ensure consistent translation.
Phase and Stereo Issues
Phase Cancellation Problems When recording with multiple microphones or using stereo sources, phase relationships between channels can cause cancellation when the mix is summed to mono. This results in thin-sounding instruments or complete disappearance of certain elements. When the same level of a signal is sent to both the left and right channels, it creates a centered phantom image in the stereo field, which is important for accurate stereo imaging. Always check mono compatibility and address phase issues with time-alignment or polarity inversion.
Insufficient Headroom Leaving inadequate headroom (less than 6dB below 0dBFS) creates problems during the mastering stage and limits your options for final processing. Peak levels should consistently hit around -6dB to provide sufficient room for mastering while maintaining good signal-to-noise ratio.
Reference Mixing and Quality Control
Professional mixing requires constant comparison with commercial standards and systematic quality control procedures. Reference mixing ensures your work meets contemporary standards and translates well across different playback systems.
Commercial Reference Selection
Choose reference tracks that match your target genre and production style. Current hits from artists like Taylor Swift, Billie Eilish, and The Weeknd provide excellent reference points for contemporary pop mixing standards. Select tracks with similar instrumentation and energy levels to your project for the most relevant comparisons.
Load reference tracks into your DAW and match their playback levels to your mix for accurate comparison. Use a reference plugin or simply adjust fader levels to compensate for loudness differences that can bias your judgment.
A/B Comparison Techniques
Frequency Response Matching Use spectrum analyzers like iZotope Insight 2 to compare the frequency balance of your mix against reference tracks. Look for major deviations in low-end energy, midrange density, and high-frequency content. While perfect matching isn’t the goal, significant differences often indicate areas for improvement.
Dynamic Range Analysis Compare the dynamic characteristics of your mix with reference material. Commercial releases typically exhibit controlled dynamics that maintain energy without fatigue. Loudness meters help ensure your mix provides appropriate dynamics for the mastering stage.
Multi-System Testing Protocol
Near-Field Monitor Testing Start quality control on your primary studio monitors, listening for balance, frequency response, and spatial imaging. Take notes on any elements that seem problematic or unclear.
Headphone Verification Switch to headphones for detailed listening that reveals subtle issues masked by room acoustics. Headphones often expose stereo imaging problems, vocal clarity issues, and low-level details that speakers might miss.
Consumer System Simulation Test your mix on consumer-grade systems including car stereo, laptop speakers, phone speakers, and earbuds. These systems reveal how your mix translates to real-world listening scenarios where most people will hear your music.
Loudness Standards Compliance Streaming platforms use different loudness normalization standards. Spotify targets -14 LUFS, while YouTube uses -13 LUFS. Use loudness meters to ensure your mix will sound competitive when normalized to these standards.

Mixing Your Own Music
Mixing your own music is both a creative and technical challenge. As the artist and mixing engineer, you have full control over every aspect of the mix, from level adjustments and panning to EQ and effects. This control allows you to shape the sound exactly as you envision it, but it also requires a solid grasp of mixing basics and a keen ear for detail.
One of the biggest challenges when mixing your own music is maintaining objectivity. It’s easy to become attached to certain sounds or performances, which can make it difficult to make unbiased decisions about what serves the song best. To overcome this, take regular breaks to rest your ears and return to the mix with a fresh perspective. Getting feedback from trusted friends or collaborators can also help you identify areas that need improvement.
Focus on creating a balanced mix where each instrument and vocal sits comfortably in the soundscape. Use panning to create space and separation, and trust your ears to guide your decisions. Remember, the goal is to create a mix that sounds great not just to you, but to anyone who listens. Ultimately, the specific techniques or workflow you use do not matter as much as achieving a result that sounds right to you and your audience.
Finalizing and Delivering Your Mix
The final stages of mixing involve technical preparation for mastering and organized delivery to clients or collaborators. Professional finishing touches and proper documentation ensure smooth handoffs and future revisions.
Bounce Settings and File Formats
Master Mix Specifications Export your final mix as a 24-bit/48kHz WAV file for professional mastering. This format preserves all audio detail while providing compatibility with mastering engineer workflows. Avoid applying limiting or master bus compression unless specifically requested, as these processes are typically handled during mastering.
Client Review Formats Create MP3 files at 320kbps for client review and feedback. These compressed files load quickly for email transmission while maintaining sufficient quality for evaluation purposes. Include the bit rate and any processing notes in the file name for clarity.
Alternative Mix Versions
Instrumental and Stem Mixes Prepare instrumental versions by muting vocal tracks while maintaining the same processing and balance. TV mix versions reduce lead vocals by 3-6dB to accommodate voice-over content. Create a cappella versions for remix potential and licensing opportunities.
Stem Delivery Some projects require stem delivery, submixes of grouped instruments like drums, bass, guitars, and vocals. Maintain consistent levels and processing while ensuring stems combine to recreate the full mix. This approach provides mastering engineers with additional control over the final balance.
File Organization and Documentation
Naming Conventions Use clear, consistent file naming that includes artist name, song title, version number, and date. For example: “Artist_SongTitle_FinalMix_v3_20241201.wav” provides immediate identification and version control.
Session Documentation Create notes documenting your plugin choices, key automation moves, and any special considerations for future reference. Include tempo, key signature, and any timing adjustments made during mixing. This documentation proves invaluable for revisions or future projects with the same artist.
Revision Management Maintain organized folders for different mix versions and client feedback. Number versions sequentially and preserve previous versions until the project is completely finished. This organization prevents confusion and allows quick access to earlier versions if needed.
Client Communication and Feedback
Feedback Collection Systems Establish clear procedures for collecting and implementing client feedback. Use time-stamped comments or systems like Mixup.audio that allow precise feedback on specific song sections. Encourage specific feedback rather than vague descriptions that lead to misunderstandings.
Revision Limits and Scope Clearly define the number of included revisions and what constitutes a major change versus minor adjustment. This boundary setting prevents unlimited revision cycles and helps clients provide focused, actionable feedback.
Music Production Tips
Achieving a good mix in music production is a combination of technical skill, creative intuition, and careful listening. Here are some essential tips to help you create a professional-sounding mix:
-
Start with a rough mix to get a sense of the overall sound and pinpoint areas that need attention.
-
Use both studio monitors and headphones to gain a comprehensive understanding of your mix and make good decisions.
-
Adjust levels, panning, and EQ to ensure all tracks are balanced and the mix sounds great on different playback systems.
-
Incorporate automation to add depth, movement, and interest to your mix, keeping the listener engaged.
-
Take regular breaks and seek feedback from others to maintain perspective and ensure your mix remains well-balanced.
-
Don’t hesitate to experiment with new techniques or effects, innovation is a key part of the music production process.
-
Always keep the mastering stage in mind; leave enough headroom in your mix for the mastering process to work effectively.
-
Use reference tracks to compare your mix to commercial releases and identify areas for improvement.
-
Capture the listener’s attention by making your mix dynamic and engaging from start to finish.
-
Apply reverb and other effects thoughtfully to add space and depth without overwhelming the most important elements.
-
Test your mix on various playback systems, including car speakers and headphones, to ensure it translates well in any environment.
By following these tips and continually refining your approach, you’ll develop the skills needed to produce mixes that stand out and connect with listeners.
Mastering Your Mixing Skills
Learning how to mix music effectively requires dedicated practice, continuous education, and systematic skill development. The most successful mixing engineers combine technical knowledge with artistic sensibility, developing their ears through consistent practice with diverse musical material.
Start with simple projects to build fundamental skills before tackling complex arrangements. Focus on achieving balance and clarity before adding creative effects or advanced techniques. Remember that great mixes serve the song, technical perfection means nothing if the emotional impact suffers.
Practice regularly with different genres and production styles to develop versatility. Each musical style presents unique challenges and conventions that expand your problem-solving abilities. Electronic music demands different skills than acoustic recordings, and understanding these differences makes you a more complete engineer.
The journey of mixing music combines technical precision with creative expression. Whether you’re producing your own music or mixing for other artists, these skills enable you to transform raw recordings into polished productions that connect with listeners. Start with the fundamentals, practice consistently, and gradually incorporate advanced techniques as your ears and technical abilities develop.
Professional mixing results from understanding both the science and art of audio production. Master the technical tools, develop your listening skills, and always remember that the best mix serves the music above all else.
Introduction to Music Mixing
Mixing music is the art and science of blending multiple audio tracks into a single, cohesive track that captures the essence of a song. At its core, mixing involves balancing levels, shaping frequencies, and enhancing the overall sound to create a polished result that resonates with listeners. In the world of music production, the mixing engineer plays a crucial role, using technical expertise and creative intuition to bring out the best in each element of the song.
A good mix ensures that every instrument, vocal, and effect is heard clearly, supporting the emotional impact and energy of the music. This process requires a deep understanding of how different sounds interact, how to manage frequencies, and how to use various tools to achieve clarity and balance. Whether you’re working on your own music or collaborating with others, mastering the basics of mixing music is essential for producing tracks that stand out and connect with your audience.
By learning the fundamentals of mixing, you’ll gain the skills needed to transform raw recordings into professional-sounding songs. From the initial combination of audio tracks to the final adjustments that make a mix shine, the process is both technical and creative, an essential step in turning musical ideas into finished works that leave a lasting impression on the listener.
Setting Up for Music Mixing
Before you dive into mixing music, it’s important to set up your workspace and prepare your tracks for the process ahead. Start by organizing your individual tracks within your digital audio workstation (DAW), making sure each instrument, vocal, and effect is clearly labeled and easy to find. This organization will help you work efficiently and make good decisions as you move through the mixing process.
Next, focus on your listening environment. A reliable pair of studio monitors is essential for accurately assessing your mix, as they provide a true representation of your sound. Complement your monitors with quality headphones, which can reveal details and quieter components that might be missed in your room. Proper monitor placement and basic room treatment can further improve your ability to hear subtle differences in your mix.
Familiarize yourself with the basics of your DAW, including navigation, track management, and plugin usage. Understanding these tools will streamline your workflow and allow you to focus on the creative aspects of mixing. It’s also helpful to review the song structure, knowing where each section begins and ends, and how the instruments and vocals are arranged, will guide your decisions as you shape the sound of the song.
By setting up your session thoughtfully and ensuring your monitoring environment is accurate, you’ll be well-equipped to tackle the challenges of mixing music and achieve a professional result.
Creating a Mix Music Plan
A successful mix starts with a clear plan. Before making any adjustments, take time to listen to the rough mix and identify the most important elements of the song. Consider which particular instrument or vocal should be the focal point, and think about how you want the overall sound to feel, whether it’s energetic and punchy, smooth and mellow, or somewhere in between.
As you create your mix music plan, factor in the genre, tempo, and mood of the track, as well as the artist’s vision and goals. Make notes about which elements need to stand out and which should play a supporting role. This planning stage is also the perfect time to decide how you’ll approach balancing levels, panning instruments across the stereo field, and shaping frequencies to avoid clashes.
By outlining your approach before you start mixing, you’ll stay focused and ensure that your mix translates well across different playback systems. A well-thought-out plan helps you make intentional choices, highlight the most important elements, and create a mix that captures the essence of the song and keeps the listener engaged from start to finish.
Using the Master Fader
The master fader is a vital tool in the music mixing process, serving as the final control point for the overall level of your mix. Rather than using the master fader for drastic volume changes, it’s best to make subtle adjustments to ensure your mix remains balanced and polished. This approach helps you maintain the integrity of your sound and prevents issues like over-compression or unwanted distortion.
Incorporating automation with the master fader can add dynamic movement to your mix, allowing you to create impactful moments and smooth transitions between song sections. For example, you might automate a slight volume boost during a chorus to enhance its energy, or gently lower the level during a breakdown for added contrast.
By using the master fader thoughtfully and in combination with automation, you can create a more engaging and professional mix that stands out in any listening environment.
Mixing Music for Clarity
Achieving clarity in your mix is essential for making sure every element of your song is heard and appreciated. Start by carefully balancing the levels of each track, ensuring that no single sound overwhelms the others. Use EQ to remove unwanted frequencies and enhance the unique character of each instrument and vocal, helping them sit comfortably in the mix.
Panning is another powerful tool for creating space and depth, allowing you to position sounds across the stereo field and give each element its own place. Adding reverb and other effects can further enhance the sense of space, but be mindful not to overdo it, too much can muddy the mix and obscure important details.
Always keep the listener’s attention in mind, guiding them through the song by highlighting key moments and transitions. By focusing on the basics of mixing music, levels, frequencies, panning, and effects, you can create a clear, dynamic, and engaging mix that brings out the best in your music and ensures every track shines.
The Importance of Mix Music Balance
Achieving the right balance when mixing music is one of the most critical aspects of creating a professional mix that truly connects with listeners. Balance refers to how all the elements, vocals, instruments, effects, and even quieter components, sit together within a song, ensuring that nothing is overpowering or lost in the mix. A good mix allows each track to contribute to the overall sound, creating a sense of cohesion and musicality that draws the listener in.
In music production, a mixing engineer must skillfully blend multiple audio tracks into a single track that sounds polished and engaging. This involves carefully adjusting levels so that the most important elements, such as lead vocals or a particular instrument, are prominent, while supporting sounds add depth and texture without cluttering the mix. Panning is used to position sounds between the left and right speakers, creating a wide and immersive stereo image that enhances the listening experience.
Frequencies also play a vital role in mix balance. By shaping the frequency content of each element, a mixing engineer can prevent different sounds from masking each other, ensuring clarity and separation. It’s important to listen to the mix on various playback systems, studio monitors, headphones, and consumer speakers, to make sure the balance holds up in different environments. This process helps identify any issues with levels or frequencies that might not be apparent on a single system.
Ultimately, the goal is to produce a mix where every element, from the loudest instrument to the quietest background detail, can be heard and appreciated. By focusing on balance throughout the mixing process, you create a mix that not only sounds great but also keeps the listener’s attention from start to finish.
Conclusion
In conclusion, mixing music is both an art and a science, requiring a deep understanding of song structure, the creative use of virtual instruments, and careful preparation for the mastering stage. To achieve a professional mix, it’s essential to start with a high-quality recording, thoughtfully arrange your tracks, and then balance levels, panning, and frequencies to create a cohesive and engaging sound. The mastering process is the final step that ensures your mix translates well across all playback systems, from studio monitors to headphones and beyond.
By following the basics of mixing music; such as using automation to add movement, checking your mix on different systems, and focusing on clarity and balance, you can produce a good mix that highlights the best elements of your music. Whether you’re working on your own music or collaborating with other artists, these principles remain the foundation of every successful mix. Remember, the key to a professional mix is not just technical skill, but also the ability to create a sound that captures the listener’s attention and leaves a lasting impression.
With patience, practice, and a commitment to refining your craft, you can master the process of mixing music and produce tracks that stand out for their quality and emotional impact. Embrace the journey, keep learning, and let your mixes reflect the unique voice and vision of your artistry.
