In the previous excerpt from the video, “Darrell Thorp Mixing Foster the People Live," Thorp talked about his master-bus compression techniques. In this one, Thorp continues processing the full mix, this time with master bus EQ.
EQ Before or After Compression
Thorp’s Preferred Order
Before getting into the specifics of the equalizer and settings he’s using, Thorp discusses the order in which he likes to place the effects on the master bus. He explains that he generally likes to put the EQ after the compressor, both on the stereo bus and on individual channels. For the latter, he says he’ll usually have a de-esser or multiband de-esser first, then the compressor and finally the EQ.
When to Reverse the Order
However, he stresses that “EQ after compressor" is not a hard-and-fast rule, it’s just what works best for him . He recommends that you try it both ways to discover which you like better.
Whether or not to put the EQ before the compressor can also be a case-by-case decision, depending on the source and context. Bear in mind that if the EQ comes before it, the compressor may act differently depending on what you’ve changed in the frequency content. For example, if you cut out a lot of bass, it will likely result in less compression, because low frequencies trigger a compressor more heavily than mids and highs. Depending on the situation, that may or may not be what you want.
Choosing the Master Bus EQ
EQ Power
Thorp chooses a UAD plug-in emulation of a Millenia NSEQ-2 equalizer for the stereo bus. The plug-in faithfully recreates the original hardware, a stereo EQ with “Twin Topology" circuitry that allows the user to choose between emulations of a tube or solid-state signal path. For this song, Thorp goes with the default, which is the modeled tube circuitry.

Here’s the UAD Millenia NSEQ-2 equalizer with Thorp’s settings.
As with the Shadow Hills Mastering Compressor that he used for bus compression, Thorp sets the NSEQ-2 to linked mode, so that the settings he makes for one side are mirrored on the other.
Adding Air
If you saw the “Al Schmitt Mixes Cyrill Aimée" video (or the free excerpt), you’ll recall that Schmitt used an NTI EQ3 hardware equalizer on the master bus to boost the airiness of the mix. Thorp applies a similar tactic here, using the NSEQ-2’s highest band only, boosting slightly—about two notches on the knob—at 21kHz.
Thorp says that boosting in this range gives the mix a sonic sheen. He plays back the track, and it sounds subtly brighter. He points out that after adding the EQ, everything will be a little clearer; with the individual elements more distinguishable in the stereo field. He likes the effect it has on the cymbals too, giving them a “nice splash." He points out that on the stereo bus, a little bit of equalization goes a long way.
Beyond Air
When a Mastering Engineer Is Involved
While adding “air" is one of the main reasons engineers and producers use EQ on the master bus, it’s not the only one. One caveat: If your mix is going to get mastered by a pro, there’s an argument to be made to leave the stereo bus EQ-ing to the mastering engineer. He or she not only has a pristine and extremely accurate monitoring setup, but also, presumably, a finely tuned set of ears, and a ton of experience with processing stereo mixes.
Matching Reference Tracks
That said, what else can you do with stereo bus EQ? One application is to try to match the overall frequency response of your mix with that of a reference song that you’re trying to make your mix sound like. It’s a lot easier said than done, but you can A/B your mix against the reference and try to make some subtle adjustments to more closely match it. Some people use matching EQs for this purpose. They’ll use one to “capture" the EQ curve from a reference and apply it to the mix.
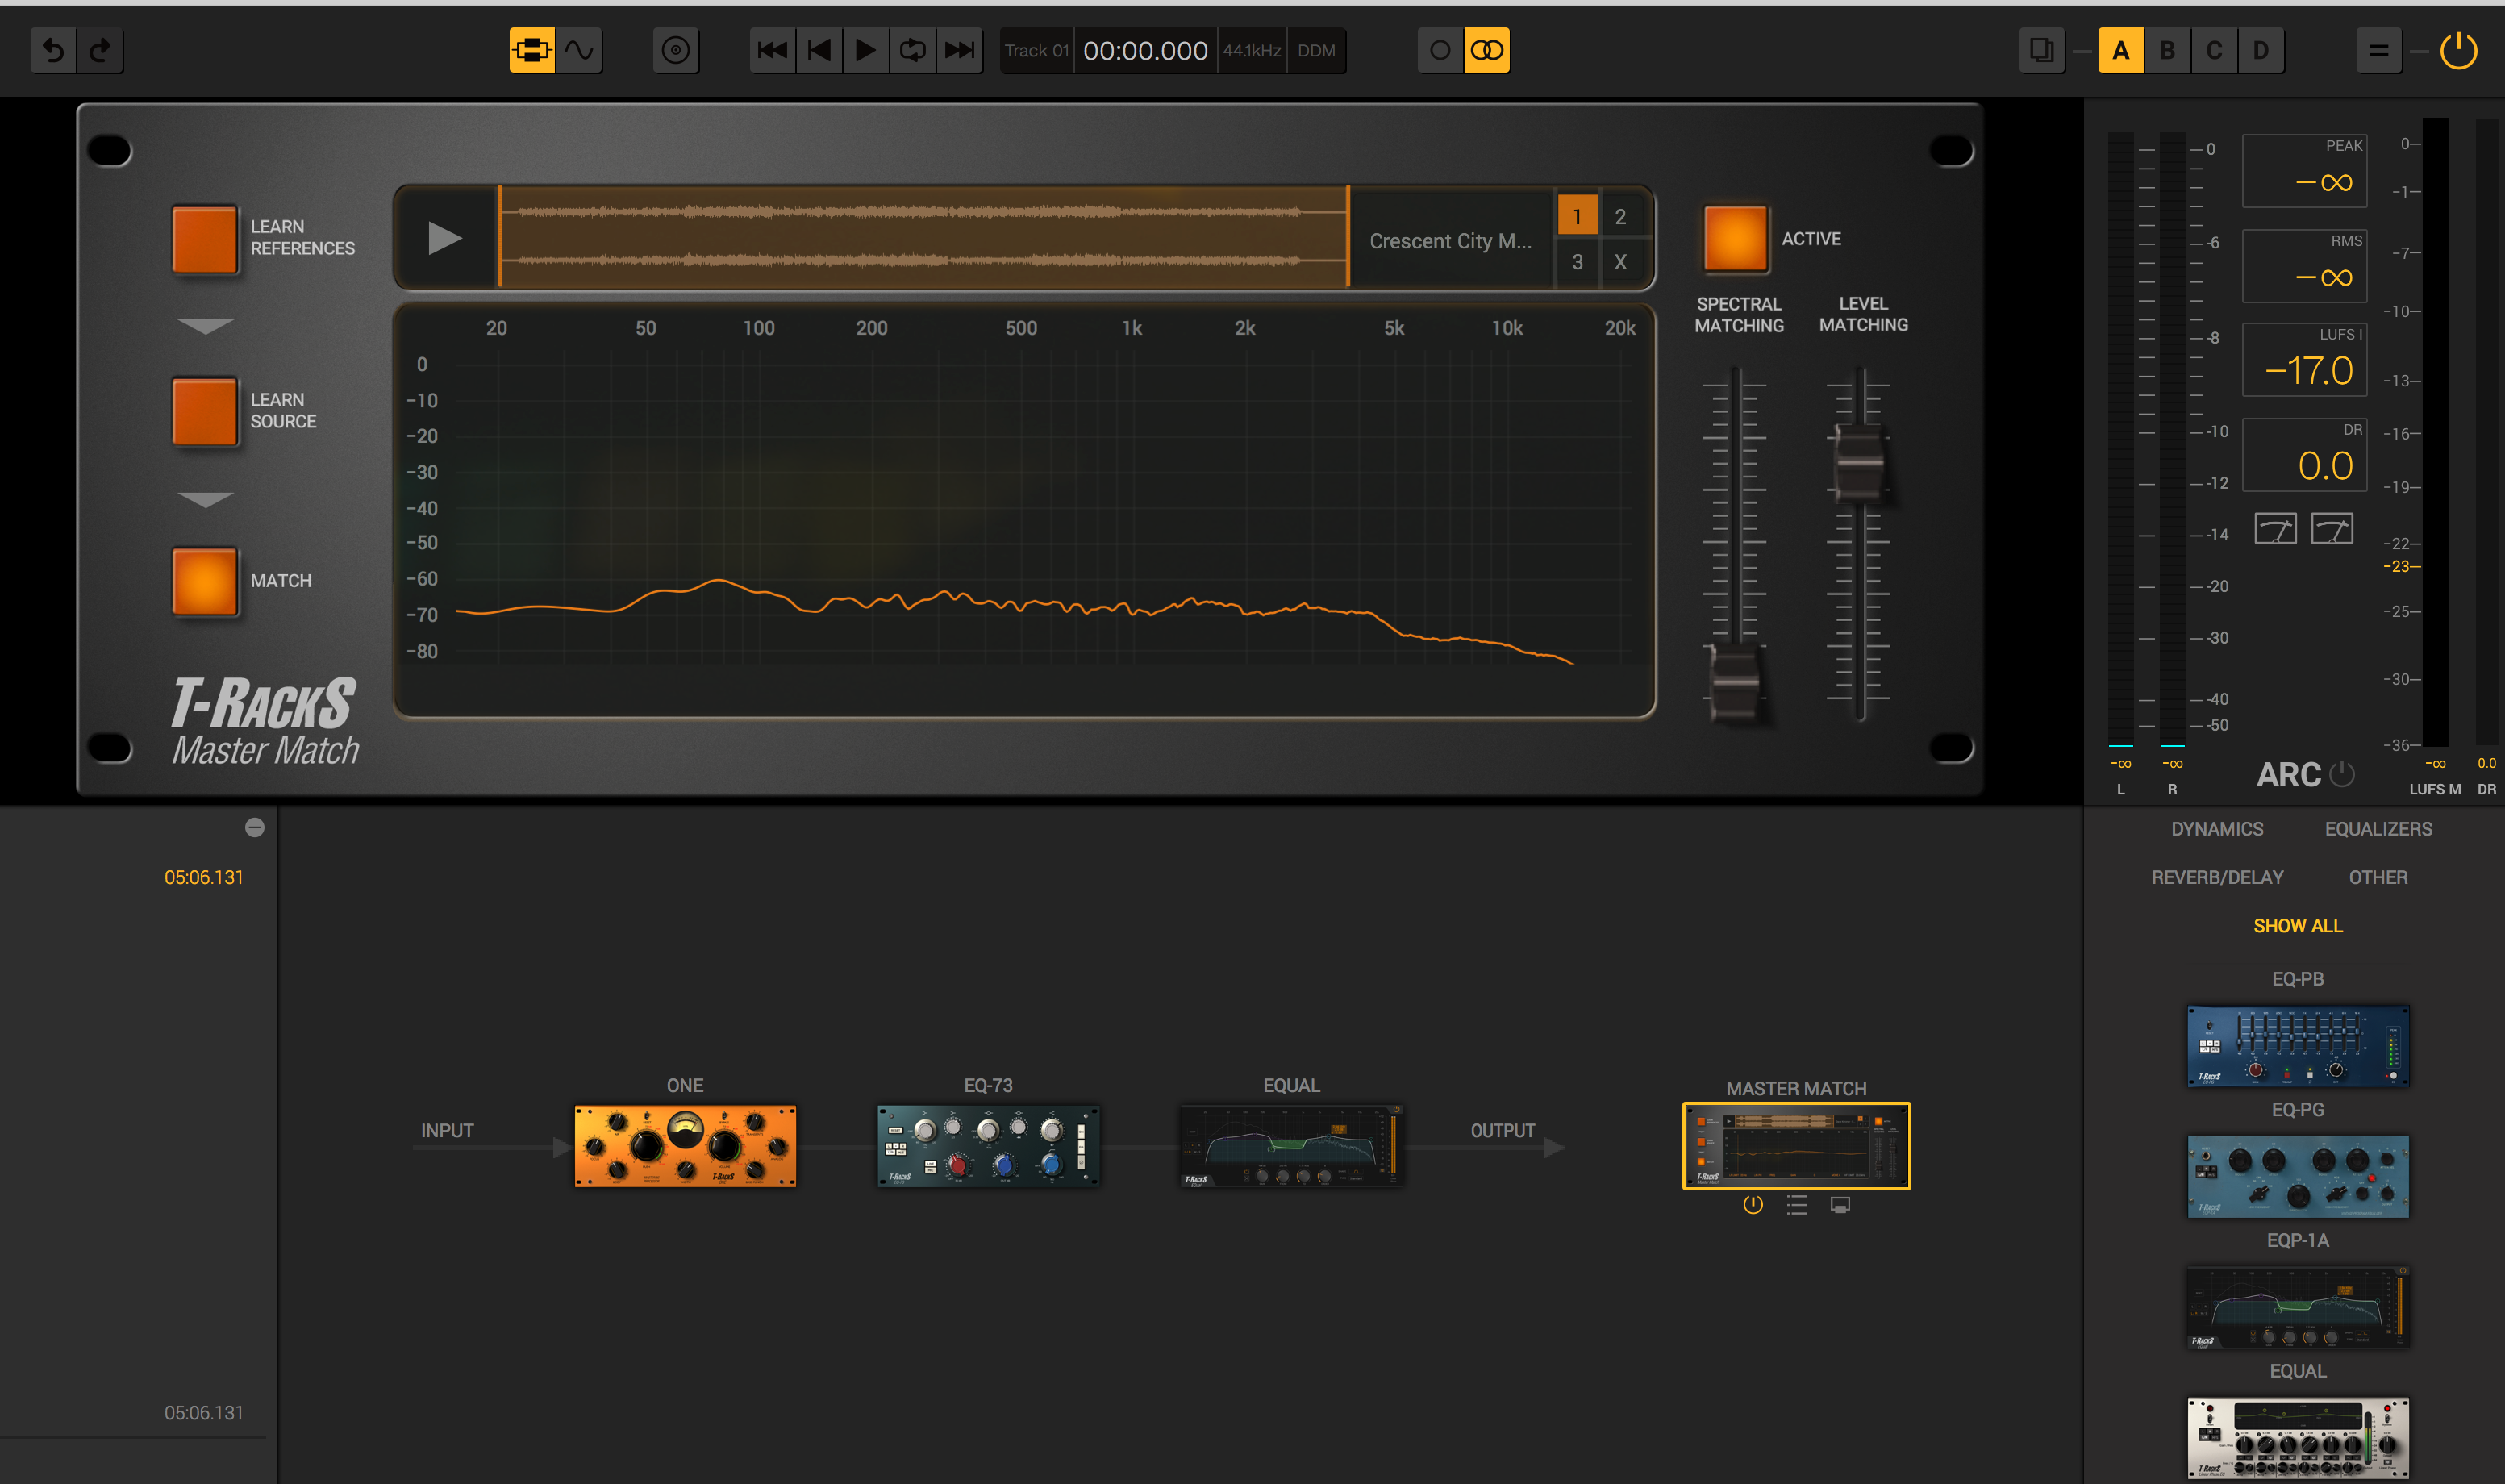
The Master Match module in IK Multimedia’s T-RackS 5 is an example of a matching EQ used for imposing the EQ curve from a reference track onto your song.
Using EQ for Coloration
Another application for master bus EQ is if you have a great sounding vintage EQ or vintage EQ emulation plug-in that will impart a pleasant warmth or another tonal attribute to your mix; you might want to insert it strictly for coloration.
High-Pass Filtering on the Master
You could also use the master bus to insert a high-pass filter (aka “low-cut" filter) that would get rid of frequencies below about 30Hz, to help clear up low-end muddiness. If you’re mixing in a genre where the subsonic bass is essential, such as dance music or hip hop, you probably don’t want to cut out that range. But for many other musical styles, high-passing the master can help overall clarity.
High-Passing Individual Tracks
PASS IT ON
Why High-Pass at the Source
Let’s continue the discussion of high-passing, but change the focus from the stereo bus to individual instrument tracks. You won’t have as much need to high-pass the master if you do it consistently on individual tracks.
You’d be surprised how much unnecessary low end you can get rid of on vocals and on a lot of instruments just by high-passing. Whereas on the master bus, you don’t want to high-pass above about 30Hz (you’d take away from the low-end impact of the mix) you have a lot more flexibility on individual instruments. With the exception of kick and bass, many sources can be filtered at a much higher frequency. If you’re careful how you set them, you can get rid of a lot of low end mud without negatively impacting the tonality of the instrument.
Finding the Right HPF Frequency
Virtually every EQ or channel strip plug-in has a high-pass filter built in. One effective way to figure out what frequency to set it at, is to slowly move the frequency knob up until you audibly hear the instrument start to thin out, and then back it off to just before that point.
The Importance of Slope
Another variable with a high-pass filter is the steepness of the slope, which determines how severely it rolls off. Typically, the most gentle slope is 6dB-per-octave, and there are also usually options for 12dB-per-octave, 24dB-per-octave slope and sometimes an even steeper slope.
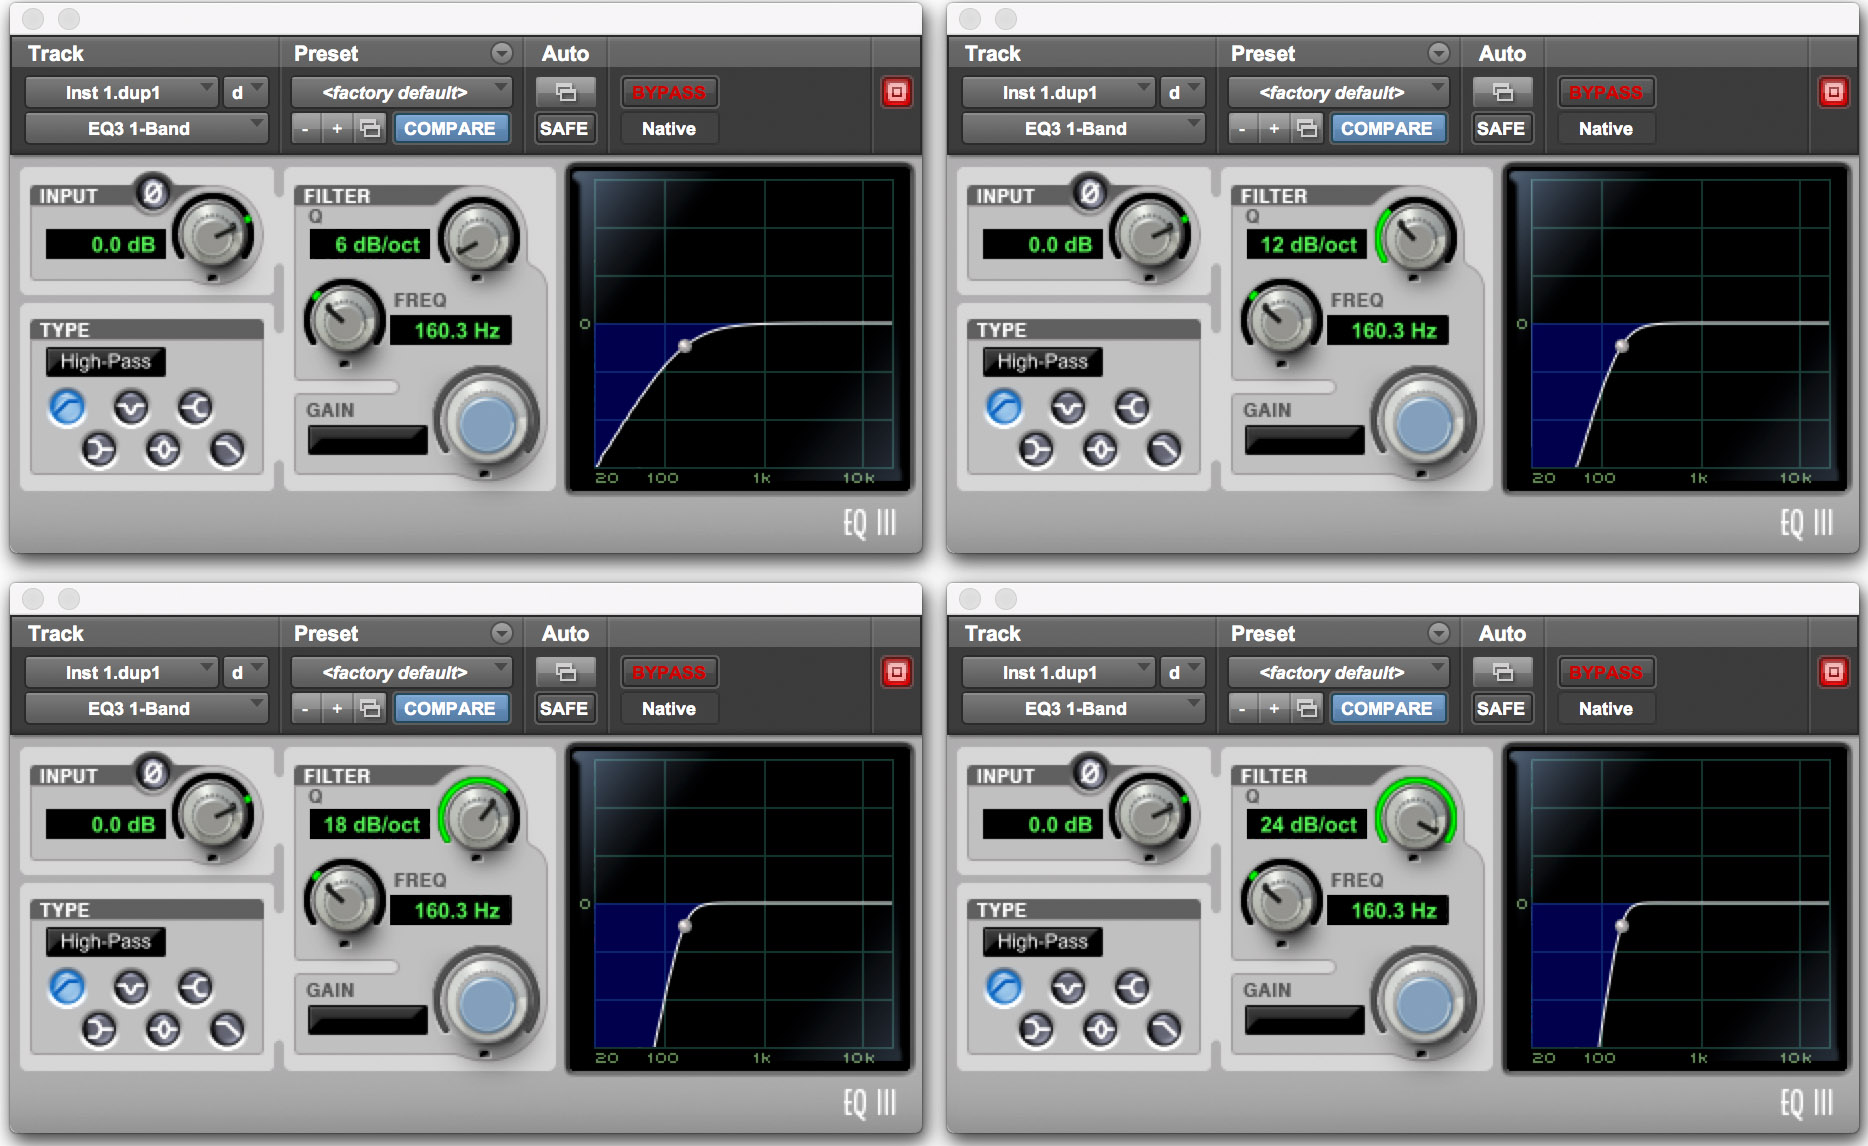
Here you see four instances of the Pro Tools EQ III, all set to high-pass filter mode at the same frequency, but with different slopes, starting clockwise from left at 6dB-per-octave and going up to 24dB-per-octave.
The following three audio examples to demonstrate that instruments don’t necessarily need all those low frequencies to sound good. In all three, you’ll hear an instrument play a short segment and then repeat it. On the repeat, a high-pass filter was added to remove unneeded lows.
Audio Examples
EX. 1 Acoustic guitar. HP filter setting: 105Hz with a 12dB-per-octave slope.
EX 2. Electric Guitar. HP filter setting 95Hz at a 24db-per-octave slope
EX. 3 Snare drum. HP filter setting: 160Hz at 12dB-per-octave
